You measure yourself once, order your usual size, and wait for the parcel. When it arrives, the waistband gaps, the sleeves stop short, and the garment that looked relaxed online pulls across the hips. The problem often isn't your body or your measuring tape alone. Your measurements may be accurate while the brand's size chart, fit model, or garment measurements tell a different story.
Learning how to take body measurements for clothing gives you a reliable starting point, but accurate tape placement is only half the job. You also need a repeatable method, a way to check errors, and a system for translating your body data into each brand's actual fit information.
Table of Contents
- Why Accurate Measurements Matter More Than Ever
- Essential Body Measurement Points and Techniques
- Advanced Measurements for Different Garment Types
- Navigating Measurement Systems and Conversions
- Common Measurement Mistakes and How to Avoid Them
- Building Your Personal Measurement Workflow
Why Accurate Measurements Matter More Than Ever
A parcel arrives, but the waistband gaps, sleeves finish short, and a supposedly relaxed top pulls across the hips. Online shopping removes the fitting room and the quick judgment a tailor makes when a garment twists or sits too low. A familiar label cannot guarantee the same result across brands, because each company may use different blocks, ease allowances, fabrics, regional systems, and intended fits.
Your bust or chest, waist, hips, inseam, and arm length provide a more reliable starting point. A size number is a brand category. A body measurement is a physical reference that you can compare with the brand's chart and, where available, the garment's finished measurements.
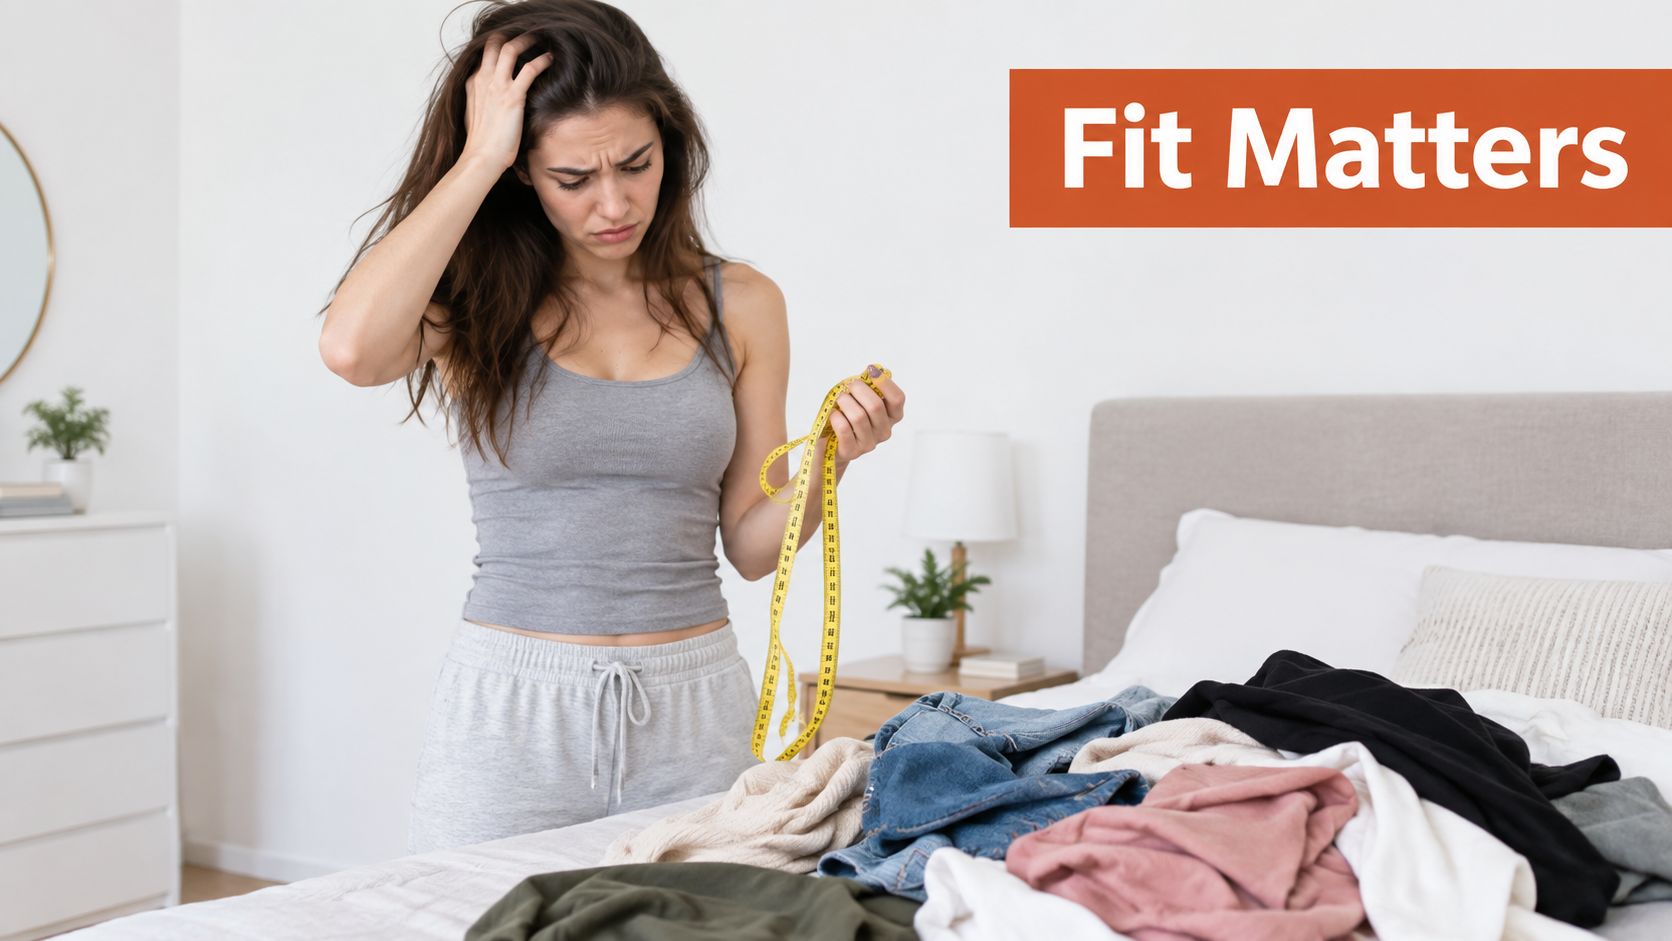
Fit uncertainty also creates direct commercial costs. Apparel is frequently cited in the 20–40% online return-rate range, far above overall retail, as described by Sizebay's guide to taking body measurements. The range does not apply equally to every retailer or product, but it shows why measurement quality needs operational attention. An incorrect size can trigger reverse logistics, repacking, customer-service work, delayed replacements, and hesitation before the next purchase.
Practical rule: Treat your measurements as a personal fit profile, not as a way to discover one permanent clothing size.
Use a simple quality-control benchmark before trusting a measurement set. Record each key measurement twice, reset the tape, and repeat any result that differs materially. Then compare the body figure with the garment's finished measurement, including stated ease. For example, if Brand A lists a 38-inch bust with 2 inches of ease and Brand B lists 40 inches under the same label, compare your 39-inch bust with those finished dimensions rather than choosing by label alone.
Sizing history helps explain why this check matters. During the U.S. Civil War era, military suppliers needed mass-produced uniforms, and large-scale soldier measurements helped establish the chest, waist, and inseam framework still common in menswear. In 1939, a U.S. government effort measured 15,000 women to create a national sizing system. By 1958, the government had introduced a voluntary numeric system from sizes 8 to 42, with tall, regular, and short height codes. That system was later dropped in 1983, as outlined by the BU Style clothing-sizing overview.
For a clothing business, retain the measurement date, method, and reviewer when checking fit data. Manual measurements can also be supplemented by a digital workflow, as explained in Robosize's AI body-measurement explanation.
Essential Body Measurement Points and Techniques
Start with a flexible tape measure, a notepad or phone, and a quiet space where you can stand naturally. Measure without shoes and wear close-fitting clothing without bulky folds. ISO guidance bases apparel measurements on defined body landmarks, while EN 13402 guidance uses centimetres and recommends measuring without clothing or in the underwear expected beneath the garment. The standard approach is more reliable than pulling a tape over a sweatshirt or guessing where a body point sits.
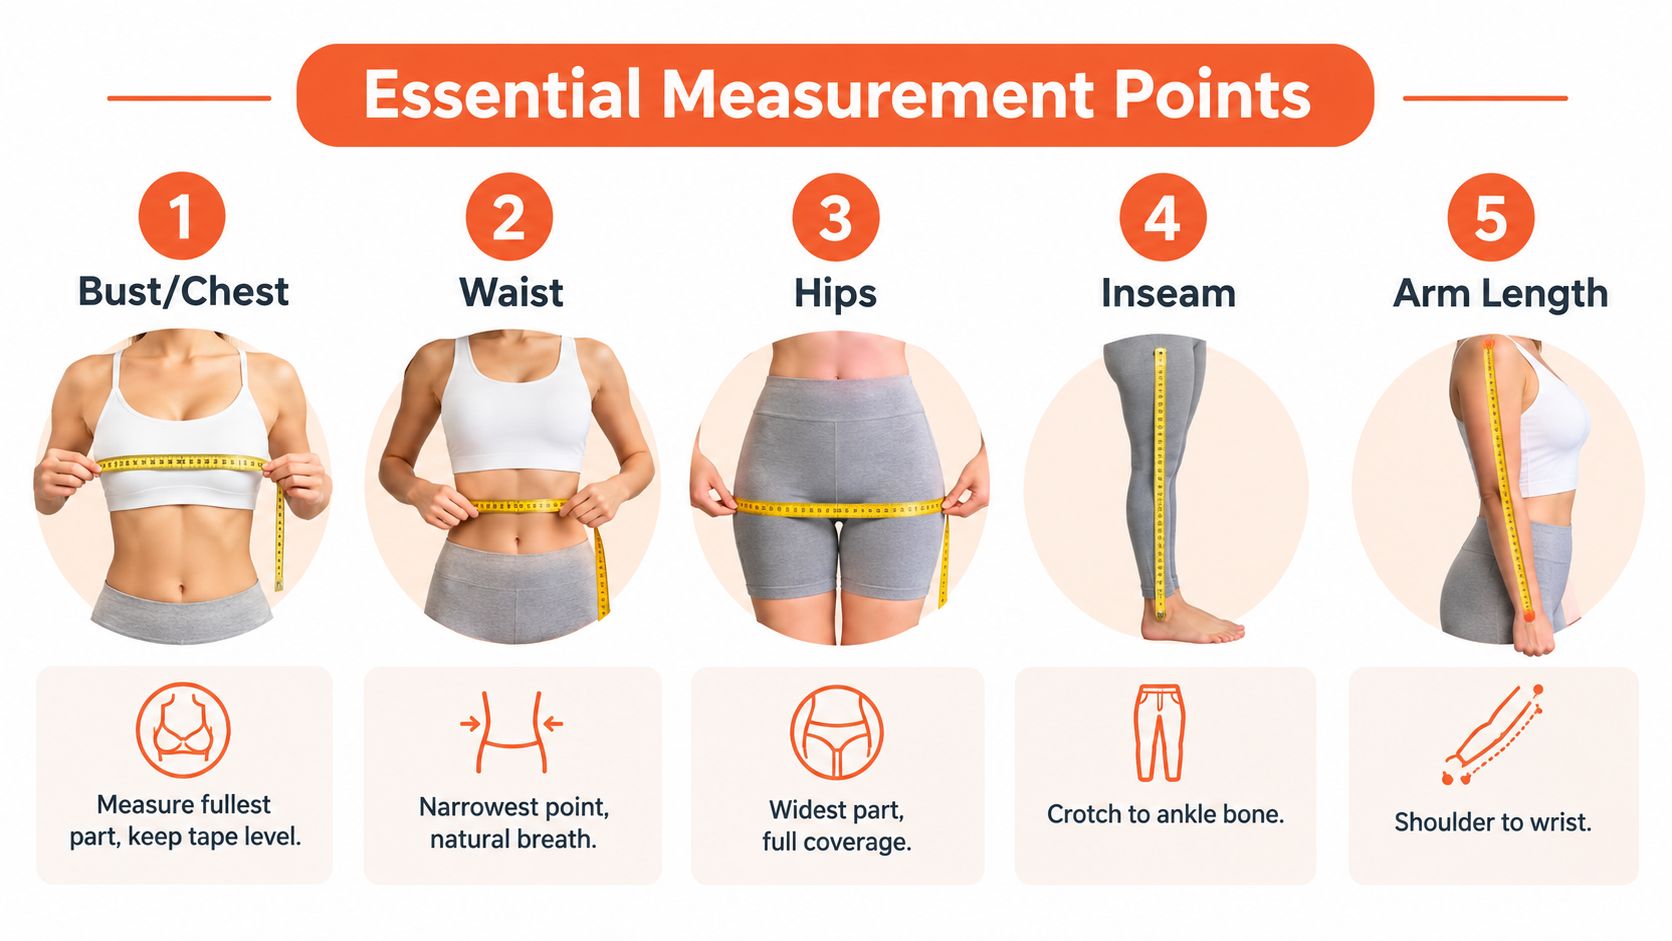
Bust or chest
Stand upright with your weight balanced over both feet. Wrap the tape around the fullest part of the bust or chest and across the shoulder blades, keeping it horizontal to the floor. Let your arms rest naturally while another person checks the tape from the side and back.
Don't pull the tape tight enough to flatten soft tissue. A compressed bust measurement can produce a top that feels restrictive, distorts the front, or pulls buttons open. A tape that slips downward across the back can create the opposite problem, leading you to choose a size that looks loose through the chest.
Waist
Find the natural waist, usually the narrower area of the torso between the ribcage and hips. Stand with a normal breath, then place the tape around that point without sucking in or pushing the stomach out. The tape should touch the body but still allow comfortable movement.
Measuring at the waistband of your favourite trousers isn't a substitute. A trouser rise may sit above or below your natural waist, and using it as the baseline can make a fitted dress or skirt sit incorrectly.
Hips
Place the tape around the fullest part of the hips and seat. Check the front, sides, and back in a mirror, because the widest point isn't always at the same vertical level for every person. Keep your feet together or in the consistent stance recommended by your measurement protocol, and make sure the tape provides full coverage without digging in.
An underestimated hip measurement is a common reason trousers pull across the seat, pockets gape, or a pencil skirt rides upward while walking.
Inseam
Stand straight while someone measures from the crotch point to the ankle bone along the inside of the leg. For trousers, use a close-fitting pair with a clearly defined crotch as a reference only if the body measurement isn't possible, and record whether the desired garment is cropped, full length, or intended to break over footwear.
Arm length
Measure from the shoulder point, where the arm joins the shoulder, over a slightly bent elbow to the wrist bone. A straight, locked elbow can produce a sleeve that feels short as soon as the wearer moves. Mark whether the garment needs to finish at the wrist, hand, or beyond it.
For a brand owner translating these figures into production, Genpire's spec sheet guide provides useful context on recording garment specifications and communicating them consistently to a factory. You need both sides of the conversation, body measurements and finished garment measurements, to diagnose fit.
Watch the measuring sequence here for a practical visual demonstration:
Advanced Measurements for Different Garment Types
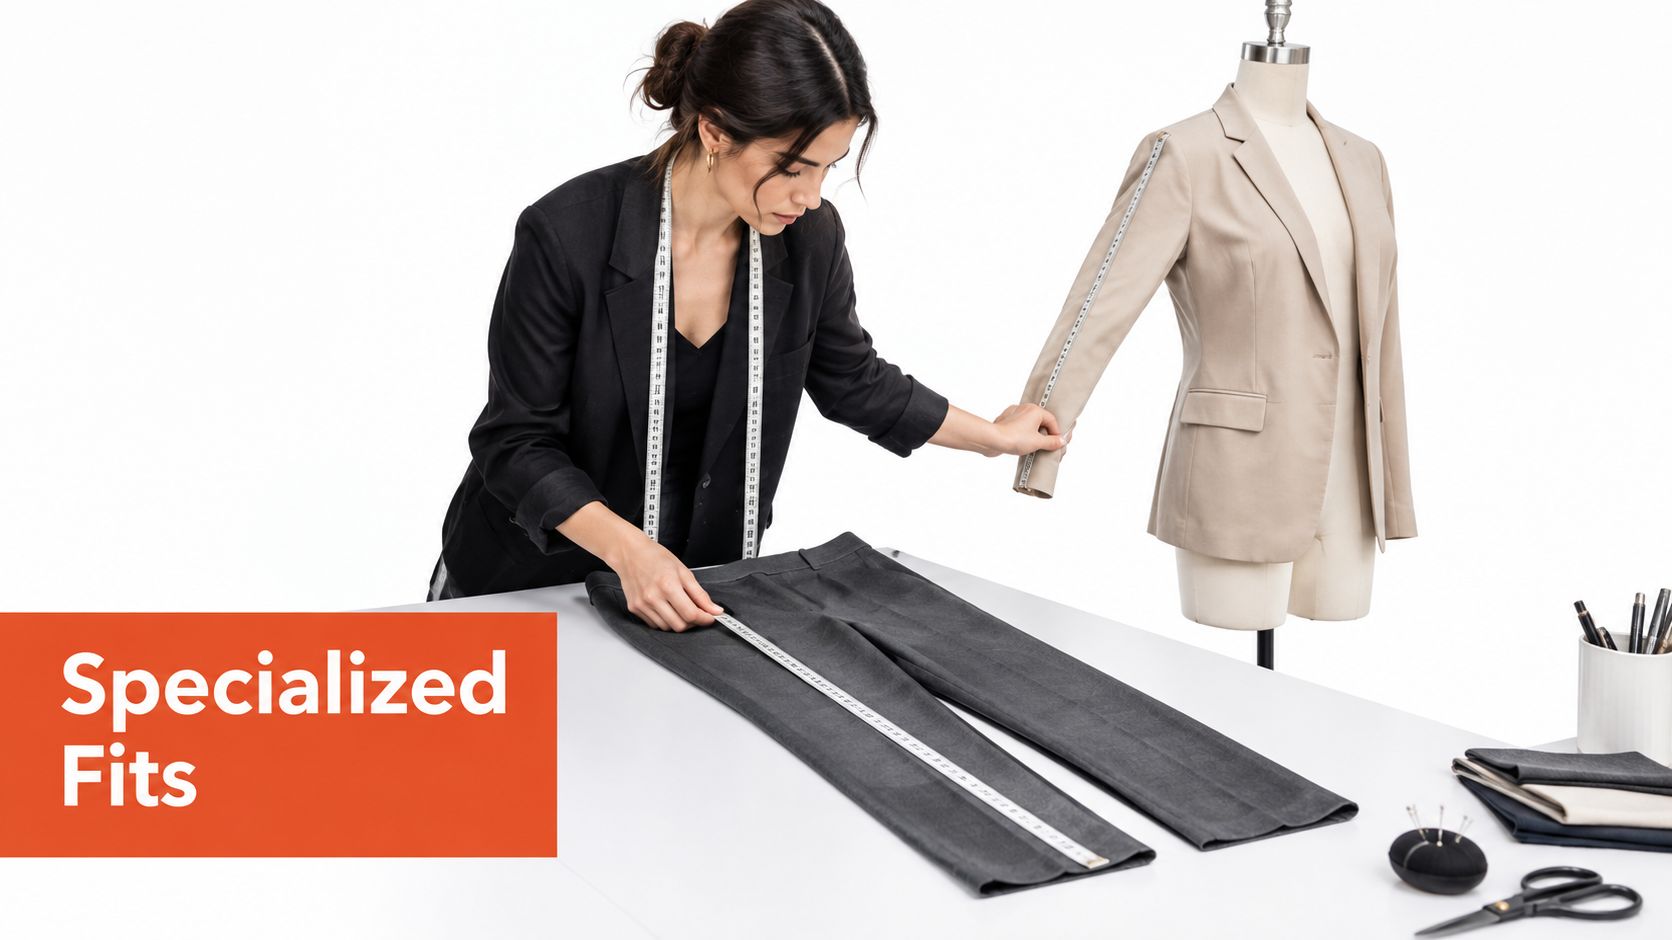
Basic circumferences won't answer every fit question. A pair of jeans, a fitted blazer, and a mid-length dress each depend on different vertical and structural landmarks. Measure the points the garment relies on rather than collecting numbers without knowing how they'll guide the purchase.
Trousers and jeans
For trousers, record the natural waist, fullest hip, inseam, and preferred rise. Rise is especially important because high-rise, mid-rise, and low-rise trousers position the waistband at different places. Measure the front rise from the crotch point to the intended waistband position, then note whether the style should sit on the natural waist or lower on the body.
The inseam needs a style decision attached to it. A measurement that works for a full-length trouser may be wrong for a cropped jean, while a wide leg can require a different hem position to avoid dragging or bunching.
Use Robosize's guide to finding pant size when comparing your body measurements with brand-specific trouser charts. The useful question isn't “What is my universal pant size?” It's “Which waist, hip, rise, and length combination matches this product?”
Tailored jackets and coats
Shoulder width is measured from one shoulder point to the other across the back, following the natural line rather than forcing the tape straight. A shoulder measurement that's too narrow can make the sleeve head lift and the collar pull away from the neck. One that's too broad can leave the shoulder seam hanging beyond the arm.
For sleeve balance, use the arm-length method from the previous section and add a cross-check from a well-fitting jacket. Coat length needs a clear starting point. A practical tailoring reference is the prominent vertebra at the base of the neck, often called C7, down to the desired hem. Mark whether the coat should finish at the hip, knee, or lower, because “coat length” alone isn't actionable.
If a customer needs body-composition context for a specialist fitting or performance garment, Telomyx's DEXA body composition testing in Manchester explains a separate assessment process. It isn't a replacement for clothing measurements, but it shows why apparel teams should distinguish body data collected for health from landmarks collected for garment construction.
Dresses and fitted skirts
For a fitted skirt, bust data may be irrelevant, but waist, hip, high hip, and skirt length matter. Measure the high hip where the garment begins to contour below the waist, then measure to the desired hem while standing naturally. For a dress, add shoulder-to-waist, waist-to-hip, and centre-back length when the design has a defined bodice.
A mid-length dress should be measured from the natural waist to the knee or intended hem, not estimated from height. Small vertical errors change where the dress crosses the leg and can alter the balance of the entire silhouette.
Navigating Measurement Systems and Conversions
A customer can match a brand's chart and still receive a poor fit if the measurement system or label convention was misunderstood. Centimetres describe the body. Label sizes describe a market convention. Converting units accurately is only the first control. The measurement must then be compared with the specific brand's chart.
Use the unit shown by the retailer whenever possible. If the chart uses inches but your records use centimetres, convert every measurement before comparing values. Do not switch units halfway through the check. The relationship is 1 inch = 2.54 centimetres, while 1 centimetre = 0.3937 inches, as set out in the ISO 8559-1:2017 standard listing.
Measurement Conversion Reference
| Body Point | Centimetres | Inches | Typical US Size Range |
|---|---|---|---|
| Bust or chest | Record your measured value | Divide centimetres by 2.54 | Check the garment chart |
| Waist | Record your measured value | Divide centimetres by 2.54 | Check the garment chart |
| Hips | Record your measured value | Divide centimetres by 2.54 | Check the garment chart |
| Inseam | Record your measured value | Divide centimetres by 2.54 | Check the garment chart |
| Arm length | Record your measured value | Divide centimetres by 2.54 | Check the garment chart |
The “Typical US Size Range” column intentionally assigns no fixed label. The U.S. voluntary government system once ranged from sizes 8 to 42, with tall, regular, and short codes, but it was later abandoned. Current labels vary by brand, product category, and intended fit, so a static conversion table can create false confidence.
Compare measurements, not labels
A European product page may list bust, waist, and hip measurements in centimetres, while an American retailer uses inches. Convert your own record first, then compare every body point with both charts. If your bust aligns with one size and your hips with another, do not average the labels. Check the brand's instructions for fit, fabric stretch, and the measurement that controls the garment.
A clothing size-conversion chart from Robosize can organize regional references, but the product-level chart remains the deciding document. Record the brand, product, date, unit, and recommended size beside the measurements. This creates a useful quality-control trail and prevents an old conversion assumption from carrying into a later purchase.
Common Measurement Mistakes and How to Avoid Them
A fit issue can begin with a tape that is only slightly too tight, angled, or poorly positioned. Unguided self-measurement is the weak point. One research study reported an average error of about 13.2% for manual body measurements without expert guidance, compared with 5.7% when guidance was provided. The same study reported average errors of about 6.7% for 3D scanning and about 5.1% to 6.1% for camera-based smartphone apps. The capture method and instructions materially affect reliability. See the Springer research on body-measurement error.
The errors that change fit decisions
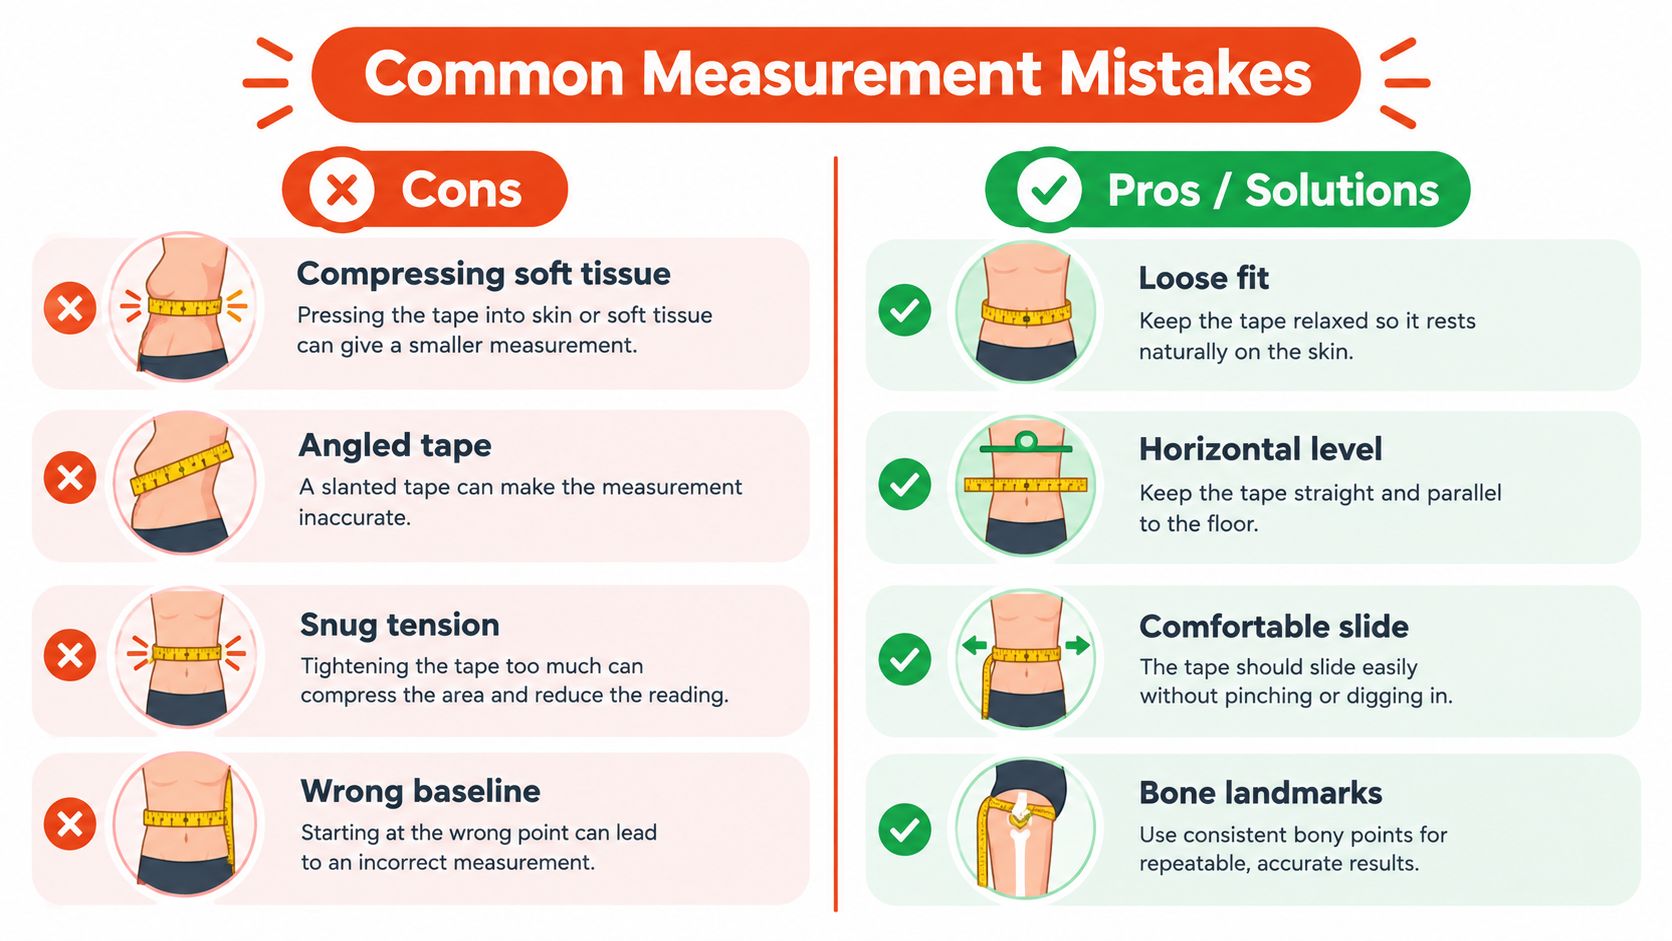
- Compressing soft tissue: Pulling firmly makes a circumference smaller than the body dimension a garment must accommodate. Keep the tape against the body without creating an indentation.
- Angling the tape: If the tape dips at the back or rises at the side, the circumference is unreliable. Use a mirror or ask a second person to check the horizontal line.
- Measuring over bulky clothing: A sweater changes both thickness and landmarks. Measure over bare skin or a thin, close-fitting base layer.
- Holding your breath: Bracing the torso creates an artificial waist measurement. Breathe normally and stand in your everyday posture.
- Using the wrong baseline: A trouser waistband is not necessarily the natural waist. Confusing the two can misdirect the fit of dresses, skirts, and high-rise trousers.
- Accepting one reading: A single number may reflect tape movement, a posture change, or a recording mistake.
Quality-control benchmark: Repeat every measurement twice. If the readings differ by more than 1 cm, take a third reading and average the two closest values. For example, waist readings of 82.0 cm and 83.5 cm trigger a third reading. If that reading is 82.2 cm, record 82.1 cm as the verified value.
This benchmark works for individual shoppers and clothing brands. It does not remove every source of variation, but it flags measurements that need checking before they enter a size profile or pattern specification. That matters when customers compare brands whose charts use different body points, fit allowances, or measurement instructions.
Why posture matters
NIST apparel anthropometry protocols generally measure a person standing upright unless a different position is specified. Keep your feet and shoulders relaxed and consistent for every reading. Do not twist to read the tape, and keep your arms down for a bust or chest circumference because lifting them changes the torso shape.
For length measurements, mark the landmarks first, then run the tape between them. A vague starting point can produce sleeves, rises, or hems that remain wrong even when the circumference chart appears accurate. Record the conditions as well as the number, especially if the measurement will guide a product chart or repeated fit check.
Building Your Personal Measurement Workflow
A dependable measurement record should help you choose across brands, not preserve a familiar size label. Start with one flexible tape, one unit system, and consistent base-layer conditions. Measure at roughly the same time of day when practical, stand naturally, and have another person hold the tape for circumference and back measurements. Self-measurement often fails when the tape shifts or the person changes posture while trying to read it.
Prepare the record before measuring
Create a table containing:
- Body point: Bust or chest, waist, hips, inseam, arm length, and garment-specific points.
- Reading one and reading two: Keep both readings, rather than writing down only the final number.
- Verified value: Apply the 1 cm quality-control rule before accepting the result.
- Date and conditions: Record clothing, posture, footwear status, and whether someone else measured you.
- Fit preference: Note whether you prefer close, standard, or relaxed garments.
Keep body measurements separate from garment measurements. A retailer may list the finished garment circumference, which includes ease, instead of the body dimension used for size selection. If the chart is incomplete, find a product-specific guide, request flat measurements from customer support, or compare the item with a garment you already own that fits well. A missing hip measurement cannot reliably be inferred from the waist label.
Record the brand chart beside your own verified values. This makes cross-brand differences visible and prevents an old label from standing in for a current measurement.
Use a garment as a diagnostic reference
A well-fitting jacket, pair of trousers, or dress can show which body point controls the fit. Lay the garment flat without stretching it, measure the relevant points consistently, and identify whether each result is a body circumference, flat width, or finished circumference. Do not compare those values until the distinction is clear.
Save the measurements in a note or spreadsheet, along with the chart used for each purchase. Update the record when your body or preferred fit changes. A digital scale or health app can simplify your wellness tracking, but weight data cannot replace bust, waist, hip, length, and shoulder landmarks for apparel.
Add technology where it solves a real problem
Manual measurement is appropriate when the tape stays level, landmarks are clear, and readings are verified. Guided digital workflows can reduce the difficulty of locating points. Camera-based systems and scanners can support repeatable capture when the setup is controlled.
Apply the same repeatability principle to digital capture: use the same posture, base layers, and landmark definitions for every scan. Then log the verified value and date in your personal fit profile before comparing it with a brand chart. This workflow application is more useful than treating a digital result as automatically correct. The Springer study on body-measurement error also supports consistent procedures, as noted earlier.
For retailers, Robosize combines shopper inputs, an optional selfie, a shopper-specific body model, virtual try-on, and a garment-level size recommendation on the product page. It supports metric and imperial units and can connect through a Shopify app or JavaScript snippet. The tool still depends on clear product measurements and sensible fit rules.
Before ordering, check:
- Confirm the unit shown on the product page.
- Compare body points, not your usual label.
- Check whether the chart describes the body or finished garment.
- Identify the controlling measurement for the garment.
- Account for stretch, lining, rise, sleeve finish, and intended ease.
- Ask the retailer when key measurements are missing.
- Save the chart and recommendation with the order.
Robosize helps apparel retailers turn shopper inputs and optional selfies into body-specific fit information, virtual try-on views, and per-garment size recommendations. If customers struggle to translate measurements into product-level decisions, visit Robosize to explore its Shopify and JavaScript integrations.