You've found a hoodie you like, checked the size chart, and still aren't sure whether the hem will stop at your waist, sit over your hips, or hang lower. The confusion usually starts with the phrase body length. A retailer may be describing the hoodie itself, while a shopper may be thinking about the length of their torso.
That distinction matters. If you measure the wrong starting point, compare a garment measurement with a body measurement, or ignore a heavy hood and ribbed hem, the tape can give you a precise number that still leads to the wrong fit.
Table of Contents
- What Body Length Actually Means on a Hoodie
- Setting Up the Flat-Lay Measurement
- Flat-Lay Versus On-Body Measuring
- Construction Details That Change the Number
- Units, Conversions, and Repeat Measurements
- Turning the Number Into the Right Size
- Quick Checks Before You Commit to a Size
What Body Length Actually Means on a Hoodie
The most common mistake is measuring the wearer's torso and treating that result as the hoodie's body length. For a size chart, body length is normally a garment measurement, not the distance from your neck to your waist.
Lay the hoodie flat and measure vertically from the high-point shoulder, usually called HPS, to the bottom edge of the finished hem. The HPS sits beside the neck, close to the collar or hood seam. The hem is the lowest edge of the hoodie, including rib trim when that trim forms part of the finished length.
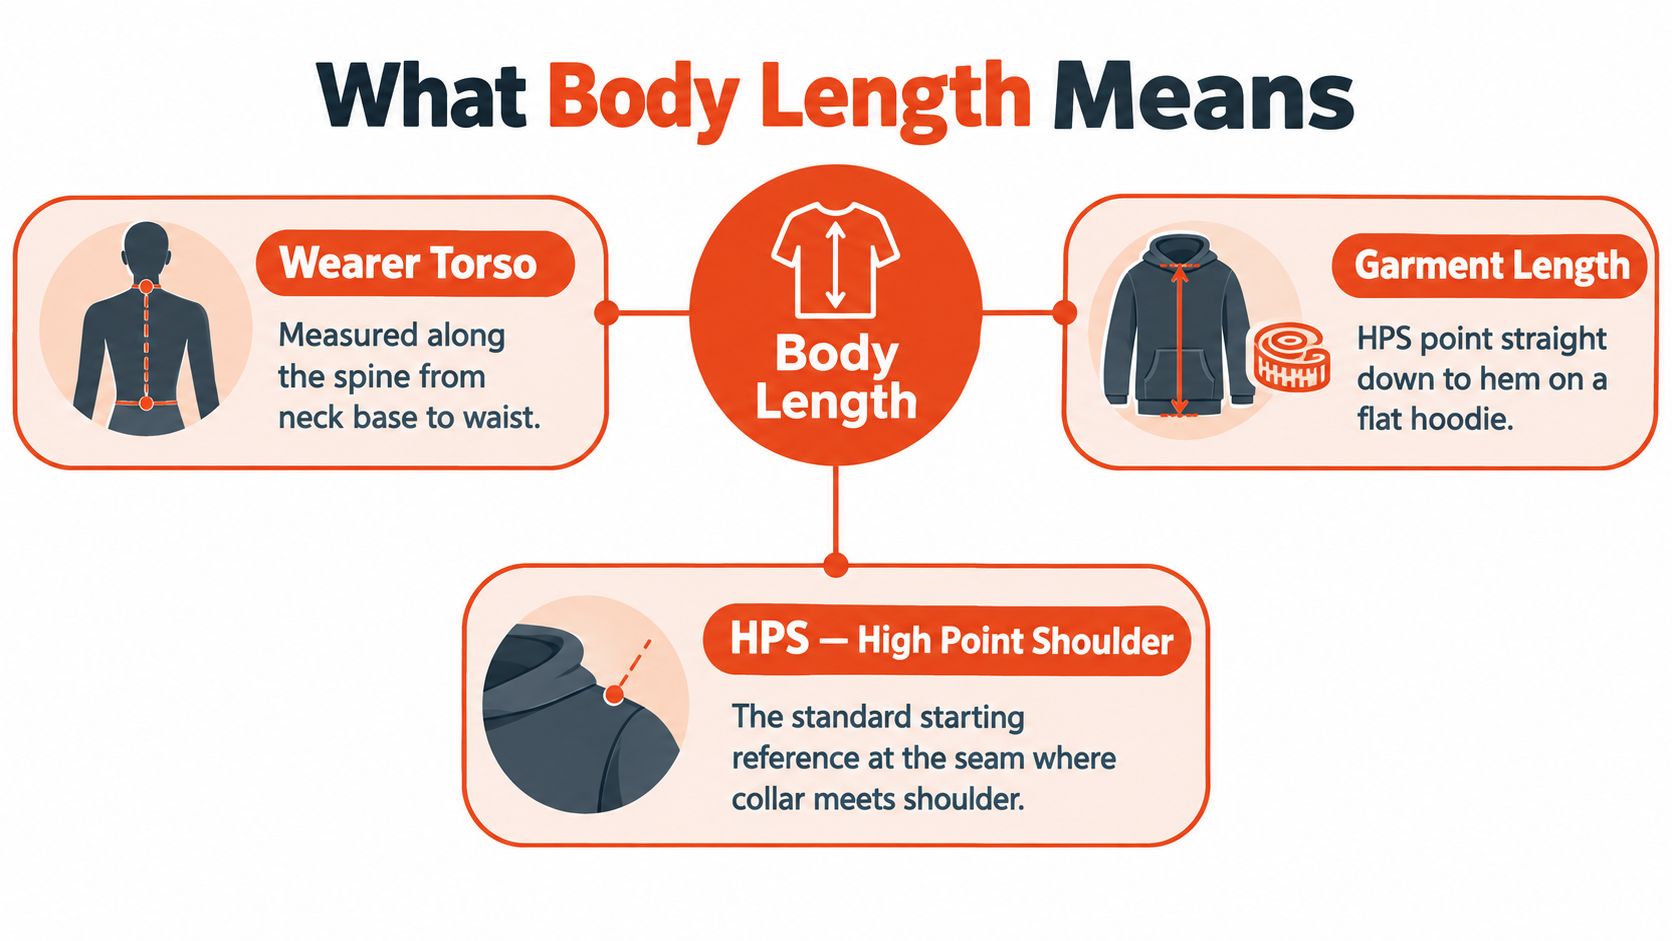
That measurement tells you where the garment is likely to land on the wearer. It can help indicate whether the hoodie will finish around the waist, hip, or below the hip, but it isn't the same as the wearer's torso length. Chest circumference and sleeve length are separate measurements, and neither should be substituted for body length.
The reference points must stay fixed
A reliable chart uses the same start and end points for every size and every product. Measuring one hoodie from the shoulder seam, then another from the center back or hood opening, creates a chart that looks consistent on paper but isn't comparable in practice.
The construction can also change how the number feels. A ribbed waistband, dropped shoulder, heavy fleece body, weighted hood, kangaroo pocket, or fabric shrinkage can alter the garment's perceived length even when the tape reading is similar. A cropped hoodie and a standard hoodie may share a measurement while creating very different silhouettes because their proportions and construction differ.
Practical rule: Record the measurement definition with the number. “HPS to hem, rib included” is useful product data. “Length” by itself isn't.
For fitting systems such as Robosize, the important distinction is to map a shopper's body dimensions and preferred hem position to the manufacturer's garment-length specification. Presenting garment length as though it were the person's body length creates avoidable confusion.
Setting Up the Flat-Lay Measurement
Start with a firm, level surface large enough for the hoodie to lie naturally. A table or clean floor works better than a soft bed, which can let seams sink and make the tape follow an unintended curve.
If the hoodie has a zipper, close it fully and make sure the zipper lies straight. For a pullover, position the front upward unless the product specification calls for a center-back measurement. Let the fabric relax before you touch the tape. You want the hoodie in its normal resting state, not stretched smooth and not compressed into a smaller shape.
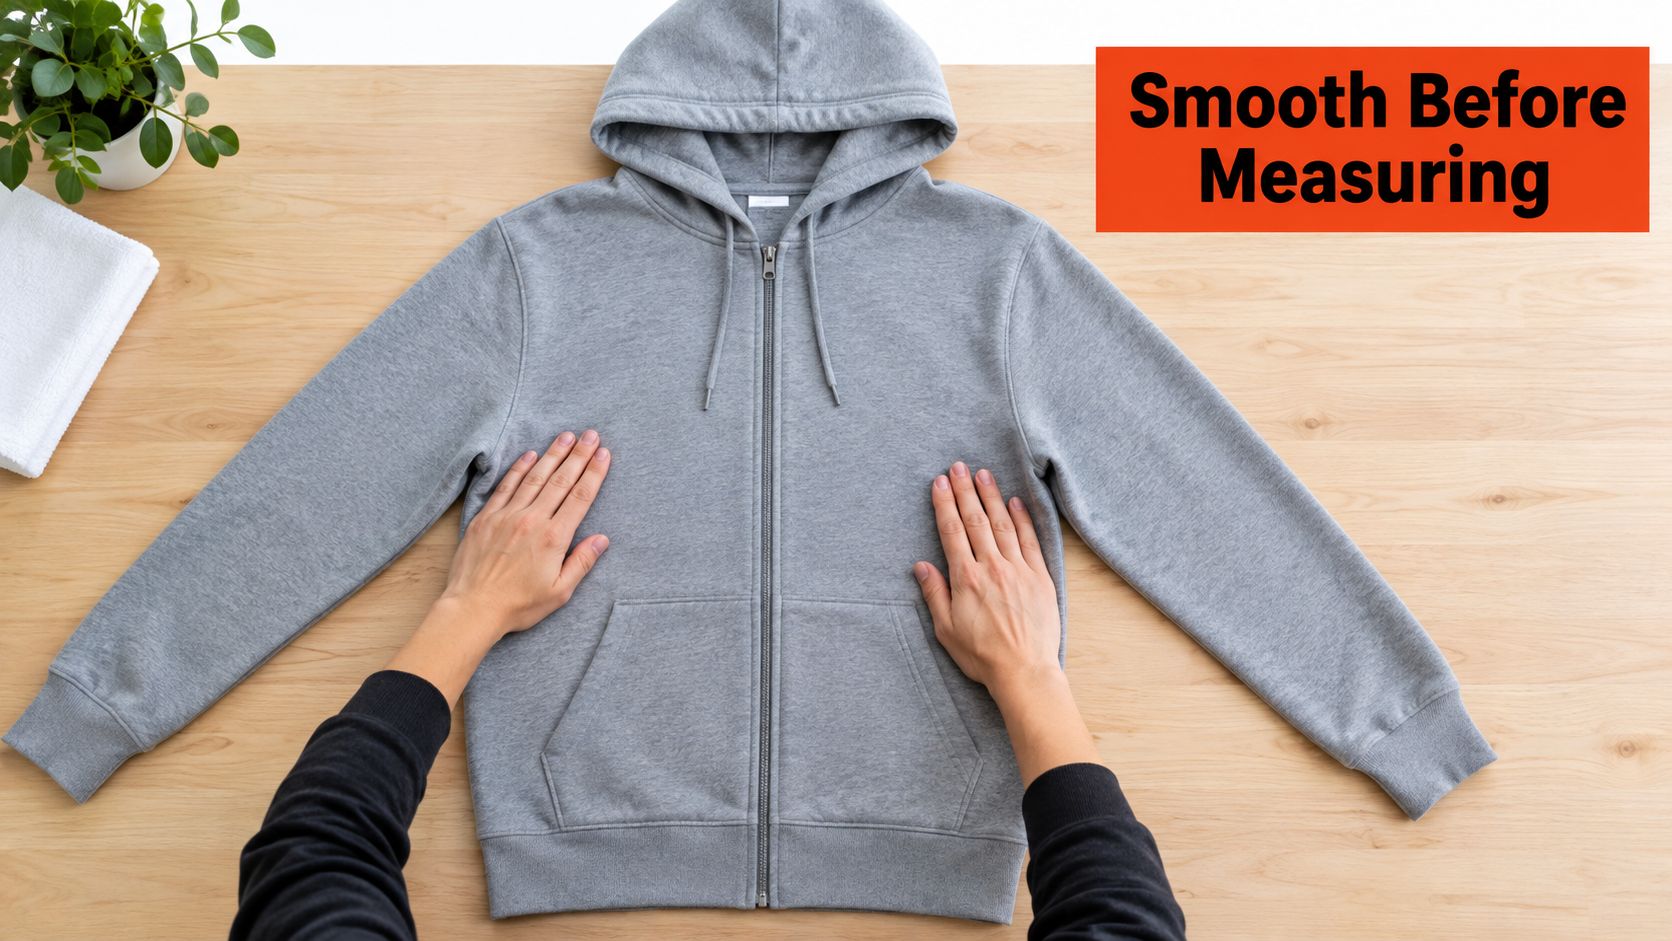
Prepare the garment in a fixed order
Use this sequence:
- Close the garment. Zip a zip-up hoodie and straighten the zipper. Keep a pullover centered rather than pulling the neckline open.
- Smooth, don't stretch. Use your hands to remove wrinkles, but don't tug the knit lengthwise or sideways.
- Align the structure. Match the shoulder and side seams so the body isn't twisted. A twisted side seam can shift the apparent HPS and hem relationship.
- Square the bottom edge. Straighten the hem and place the ribbing in its normal relaxed position. Don't pull rib trim to its maximum extension.
- Settle the hood. Keep the hood lying naturally. Don't use the hood opening as the starting point, because its shape and depth vary independently from the torso.
- Mark the endpoints. Identify the HPS beside the neck seam and the lowest finished edge of the hem before placing the tape.
The tape should run vertically between those points. It shouldn't angle toward the center back, follow the shoulder slope, or bend around the hood. If the product has a curved hem, document whether you're recording front length, center-back length, or HPS length. Those readings aren't interchangeable.
For a broader routine covering the surrounding body inputs, use this body measurement guide for apparel fitting. It complements the garment measurement rather than replacing it.
Measurement discipline: A trustworthy size chart depends less on a complicated tool than on repeating the same setup every time.
Flat-Lay Versus On-Body Measuring
The flat-lay method and the on-body method answer different questions. Treating them as interchangeable is what causes most of the sizing friction.
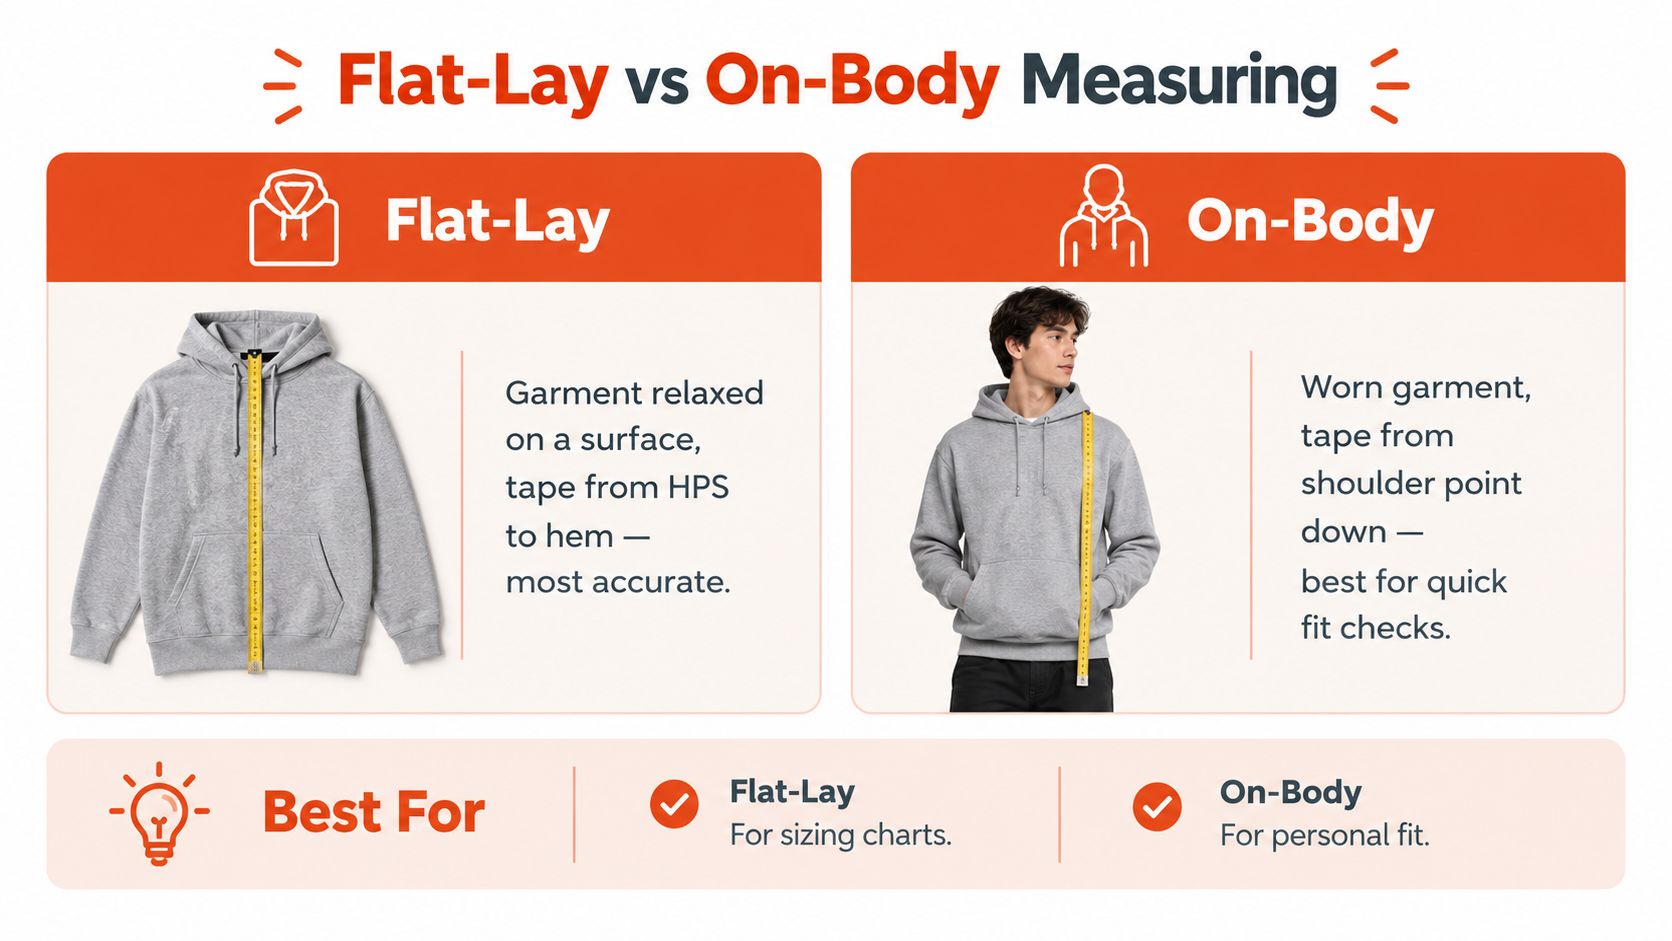
The flat-lay measurement tells you what the manufacturer made. With the hoodie relaxed, measure from HPS straight down to the finished hem. This is the method that best matches a retailer's garment size chart because another person can repeat it on the same product and reach a comparable result.
The on-body measurement tells you what length you want to wear. Stand naturally and measure from the bony shoulder point near the base of the neck down to the place where you want the hem to finish. That endpoint might be the waist, the fullest part of the hip, or below the hip. It captures preference, but it rarely matches the manufacturer's measurement method exactly.
Use each method for the job it handles best
| Method | What it tells you | Best use |
|---|---|---|
| Flat-lay | The hoodie's defined HPS-to-hem specification | Comparing products and size charts |
| On-body | Your preferred endpoint on your body | Defining the look you want |
| Reference garment | The proportions of a hoodie you already like | Translating preference into a product comparison |
The practical way to reconcile the numbers is to use your preferred hoodie as the bridge. Measure that hoodie flat from its stated start point to its hem, then compare the result with the new product's garment chart. Separately, note where your reference hoodie lands when worn. That gives you both the numerical target and the visual outcome.
An on-body measurement is especially useful when you don't have a reference garment. If you want the new hoodie at the hip, measure to that position and use the result as a preference guide, not as a direct substitute for the product's HPS measurement. Construction can make the same nominal length sit differently.
The video below provides a visual comparison of the two approaches.
Product photography can also help you judge where the hem lands, but only when the garment is shown consistently. For teams creating or reviewing apparel imagery, this guide to apparel photo standards is useful for keeping garment presentation clear enough to support measurement decisions.
Construction Details That Change the Number
A tape reading is only meaningful when you understand the hoodie's pattern and materials. Two garments can have similar HPS-to-hem measurements and still wear differently because the shoulder, hood, hem, or fabric distributes that length in another way.
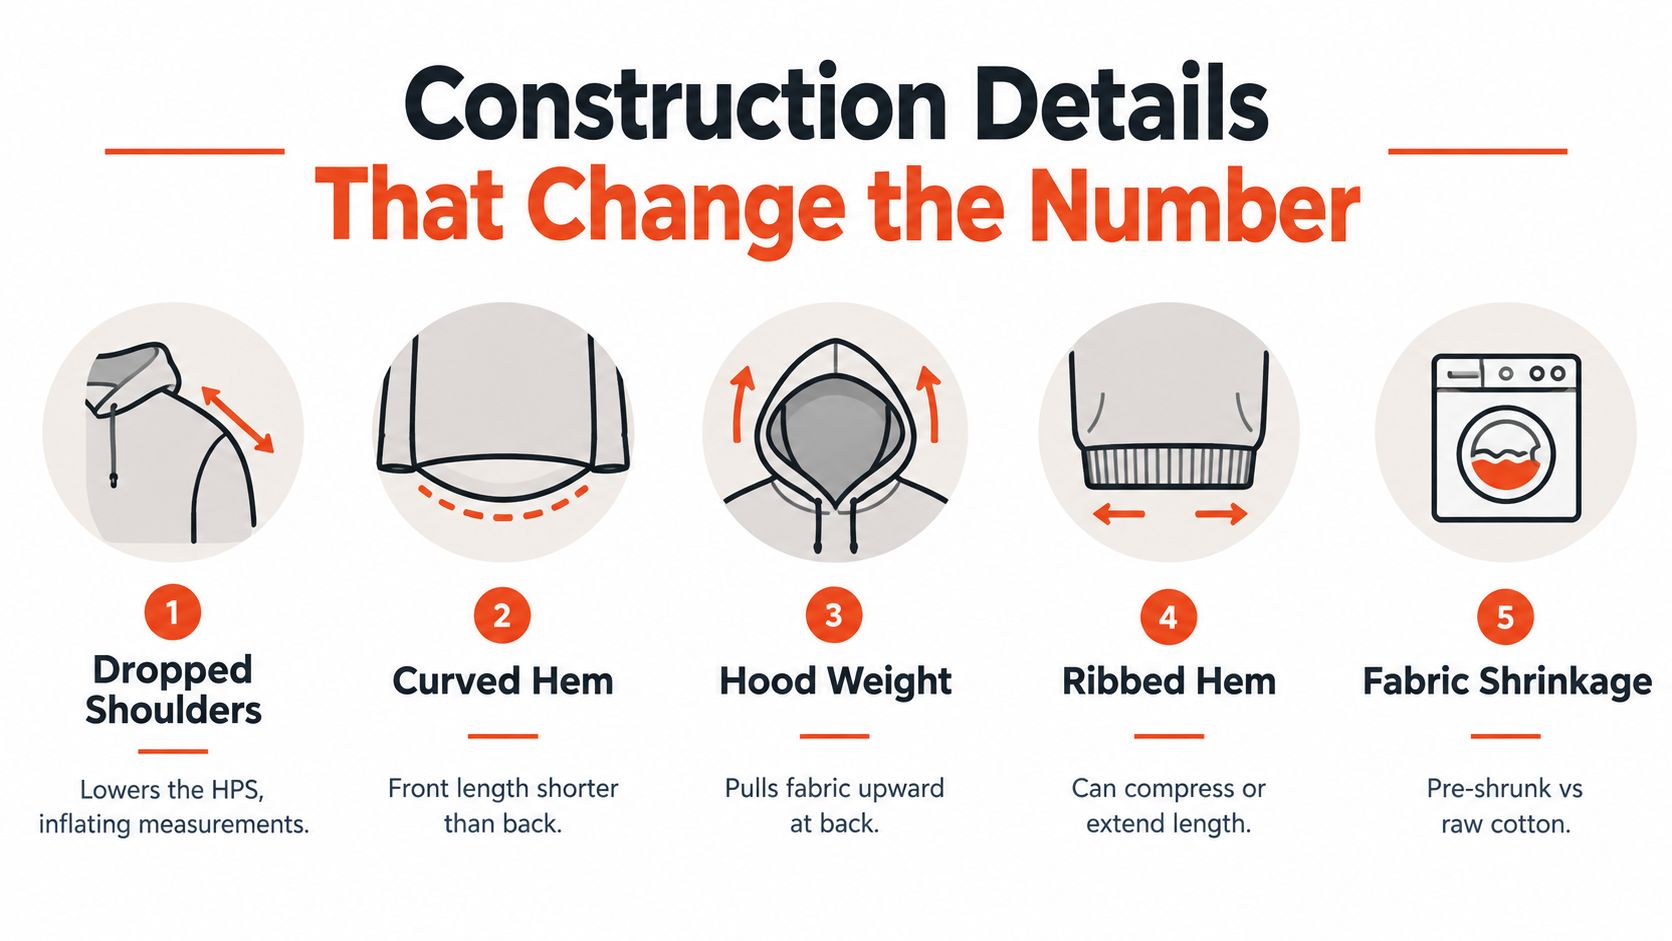
Dropped shoulders are a frequent source of confusion. The shoulder seam sits farther down the arm, so the HPS is lower than it would be on a conventional shoulder. Measuring from that lower seam can produce a longer garment reading, while the wearer may experience a broad, relaxed shape rather than a proportionally longer torso.
A curved hem creates another problem. The front edge may finish higher than the back, so “body length” needs a location label. A center-back measurement won't tell you exactly where the front will land, especially when the wearer bends, sits, or layers the hoodie over another garment.
Inspect the features around the measurement
- Hood weight: A substantial hood can pull the back neckline down on the body, changing perceived length even when the flat garment is measured correctly.
- Kangaroo pockets: A large pocket adds weight and structure to the front panel. It can influence how the front hangs, particularly in soft fleece.
- Ribbed waistband: Ribbing can compress, relax, or extend depending on how it's handled. Measure it in its normal, unstretched state and state whether it's included.
- Heavy fleece: Thick fabric doesn't always fall like lightweight jersey. It may hold a more rigid shape on the table and feel less flexible when worn.
- Fabric shrinkage: A washed or pre-shrunk hoodie may not match an untreated sample. Product data should state whether the measurement was taken before or after washing.
The starting point also changes with the pattern. Raglan sleeves, asymmetric panels, and strongly dropped shoulders may require the retailer to document an alternative measurement definition rather than force the garment into a standard that doesn't describe it well.
Inconsistent labels create the same problem as vanity sizing in clothing charts. A letter such as “M” has limited meaning without the garment measurements and the intended fit.
Construction check: Don't ask only, “What is the length?” Ask, “From which point, along which panel, with which hem treatment?”
Units, Conversions, and Repeat Measurements
Choose one unit for the working measurement, then convert only when comparing the result with a size chart. Multiply inches by 2.54 to get centimeters, or divide centimeters by 2.54 to get inches. Record the original reading alongside the conversion so another person can check the calculation.
Measure the same hoodie twice, keeping the garment flat and using the same HPS and finished-hem endpoints each time. If the readings differ, reset the garment and check those endpoints before taking another reading. Average the final readings without rounding first, since early rounding can conceal a setup error.
Double flat width measurements for chest or hem circumference. Body length is read and recorded as a single vertical measurement, from the defined starting point to the defined hem endpoint.
For repeatable product records, store the unit, measurement points, and garment state together. A useful entry identifies HPS to finished hem, states whether rib trim is included, and records whether the hoodie was measured zipped or unzipped. This method also keeps garment length separate from wearer torso length. The number describes the hoodie on the table, while the desired waist, hip, or below-hip hem position determines whether that number suits the wearer.
International sizing history helps explain why labels alone provide limited guidance. Industrial clothing production created demand for repeatable body and garment measurements, and international work eventually contributed to ISO 8559, published in 1989, covering garment construction and anthropometric body dimensions. That history supports careful measurement records. It does not make labels interchangeable between markets. The historical overview of clothing-sizing standardization describes this development in greater detail.
Keep the measurement definition beside the result whenever a hoodie is added to a catalog. A rounded number without its method cannot reliably guide a size choice or confirm the intended hem position.
Turning the Number Into the Right Size
The right flat-lay length starts with the hem position you want, not with a generic label. Decide whether the hoodie should finish at the waist, hip, or below the hip, then compare that visual target with a reference hoodie or product photo.
If you prefer a waist-length or cropped look, a shorter HPS-to-hem measurement may be appropriate, but the shape still depends on shoulder width, chest volume, and rib tension. A hip-length everyday hoodie needs enough body length to stay in position while you move, without assuming that a larger overall size is the answer.
A below-hip or longline style changes the target again. Oversized garments may add width and dropped-shoulder volume rather than just extending the torso. Sizing up can therefore create excess chest, shoulder, or sleeve room while failing to deliver the hem position you wanted.
Compare the whole silhouette
Use a favorite hoodie as your personal benchmark:
- Record its defined body length.
- Note where the hem lands when you're standing and sitting.
- Compare chest, shoulder, sleeve, and hem proportions with the new product.
- Match the new garment's measurement method before judging the number.
For practical examples of comparing apparel measurements, these Comfort Colors measurement tips for business apparel can help you evaluate a reference garment rather than relying only on the label.
An AI fitting workflow handles the same translation at scale. It can combine height, weight, body shape, torso proportions, and preferred fit with the manufacturer's garment specification. Instead of treating “body length” as one universal number, the system can recommend the product size whose actual HPS-to-hem measurement best matches the shopper's intended endpoint. The approach is more useful than telling every long-torsoed shopper to size up.
For a broader overview of choosing a size from body and garment inputs, see what size are you. The key is still product-specific comparison. A recommendation should point to the garment specification behind the choice.
Quick Checks Before You Commit to a Size
Before buying, run four checks. They take less time than correcting a hoodie that fits across the chest but finishes at the wrong place.
- Confirm the start point. The measurement should begin at HPS or the clearly labeled alternative. It shouldn't start at the hood opening, center-front neckline, or an arbitrary point on the collar.
- Confirm the end point. Check whether the number reaches the bottom edge of the finished hem and includes rib trim where applicable.
- Confirm the garment state. The hoodie should have been measured flat, relaxed, and without the fabric being pulled into shape.
- Confirm the intended landing zone. Compare the listed length with where you want the hem to sit, whether that's the waist, hip, or below the hip.
Don't automatically size up for length. A larger size may add body length, but it can also add unwanted chest width, shoulder drop, sleeve length, and hem volume. Compare the next size's complete garment measurements first. If the cut is cropped, dropped-shoulder, curved-hem, or longline, the construction may matter more than the letter on the label.
Final fit test: If the chart doesn't define its start point, end point, unit, and hem treatment, treat the length as incomplete product data.
Robosize combines shopper inputs with product-specific size charts and can show a per-garment size recommendation through a Shopify app or JavaScript integration. Visit Robosize to see how an AI fitting flow can translate hoodie length preferences into a clearer size choice.