You've got a tape measure in one hand, a checkout page open in the other, and a size chart that seems to speak a different language from every item in your wardrobe. The number around your waist looks plausible, but you're not sure whether the tape is level, whether you pulled it too tightly, or whether the brand's “medium” bears any relation to the last medium you bought.
Learning how to take your own measurements gives you a dependable starting point for online shopping. You don't need tailor-perfect numbers. You need a repeatable method, clear notes, and enough judgment to know when a measurement needs a second check.
Table of Contents
- Why Getting Your Measurements Right Changes Everything
- What You Need Before You Start Measuring
- Measuring Bust Waist Hips and Inseam Step by Step
- Which Measurements Matter for Tops Bottoms and Dresses
- Common Measurement Mistakes and How to Fix Them
- Recording and Using Your Numbers at Checkout
- When Selfies and Virtual Try-On Make More Sense
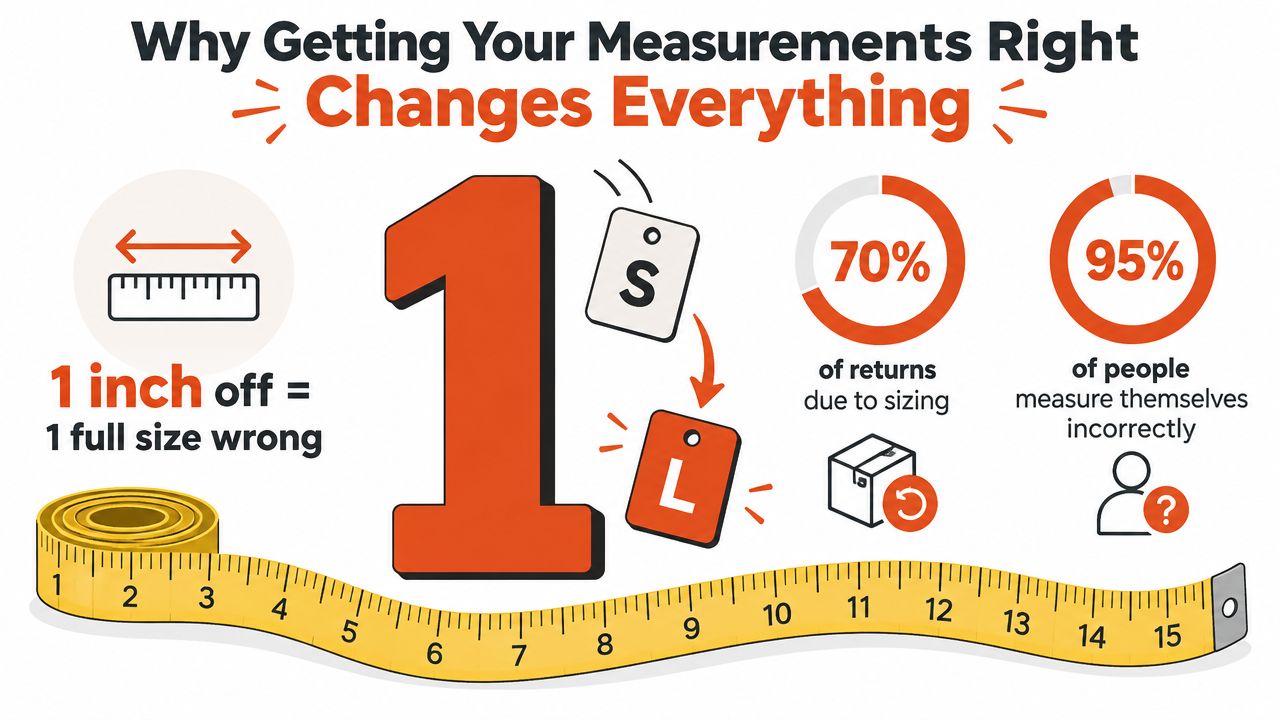
Why Getting Your Measurements Right Changes Everything
Online size charts work from body landmarks, not from the letter or number printed on a label. International apparel systems support this approach through standardized measurement vocabulary and procedures. ISO 8559-1:2017 provides guidance for anthropometric measurements used in clothing product development, while ASTM D5219 defines terminology for body dimensions used in apparel sizing. European standard EN 13402 also uses primary dimensions such as height, bust, waist, and hip when describing garment sizes. You can review the background through the ISO standard for anthropometric measurements.
That matters because a small error in one landmark can move you toward the wrong part of a size chart. A fitted blouse may depend mainly on your bust and shoulders, while jeans may depend more heavily on your waist, hip, rise, and inseam. The label is only a shortcut. The garment's own chart is the reference point.
Practical rule: Consistency is more useful than a supposedly perfect measurement taken only once.
A self-measuring routine should leave you with three useful outcomes:
- A repeatable home method: You'll know how to position the tape, keep it level, and avoid common posture or tension problems.
- A portable record: Your measurements can stay in a notes app or notebook, ready for different retailers and garment categories.
- A reliability check: You'll recognize when a number is uncertain enough to repeat, ask for help, or use a guided digital tool instead.
Small mistakes are normal. If the tape slips slightly, write down the result, relax, and take it again. Independent technical review data cited in a 2026 review reports average error of about 13.2% for unguided manual measurements, compared with about 5.7% with guided workflows (Size.ly's review of measurement accuracy). That difference doesn't mean solo measuring is useless. It means technique and guidance can materially improve the result.
What You Need Before You Start Measuring
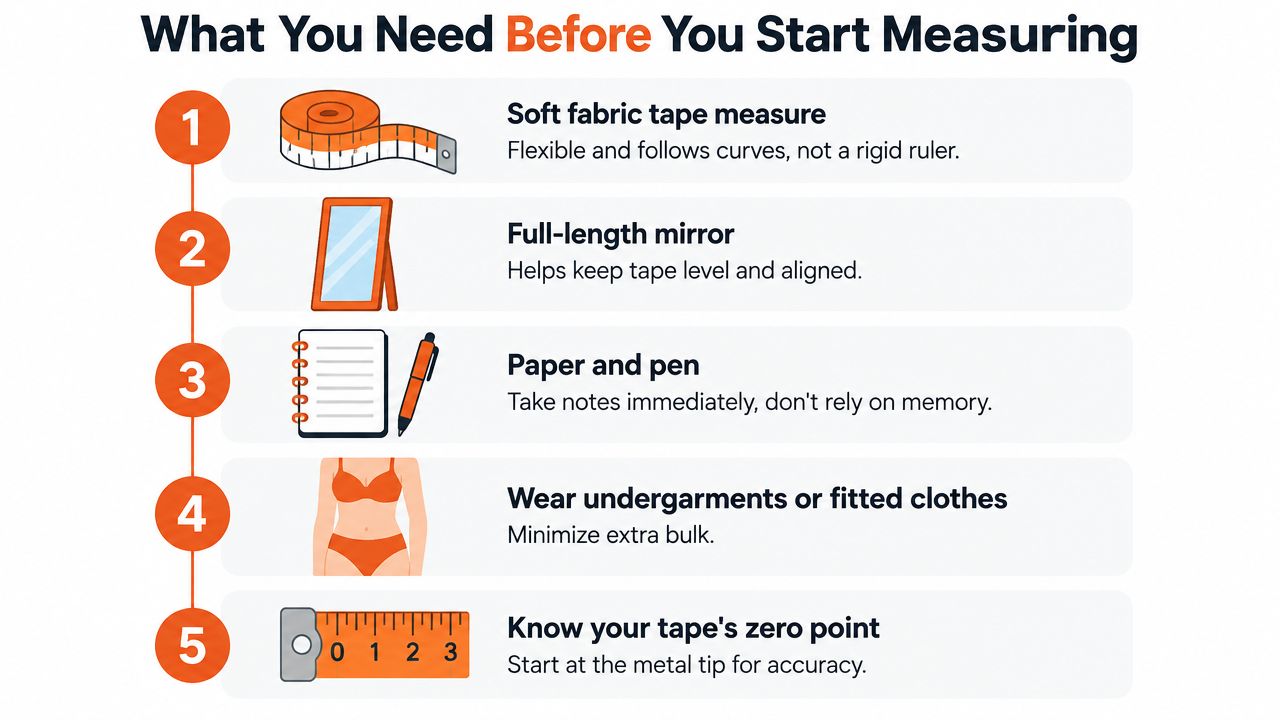
Set up your measuring station before you remove the tape from its packet. A calm, organized start prevents the rushed twisting and guessing that usually creates unreliable numbers.
Choose a flexible fabric tape. A soft, non-stretch tape follows curves around your body. A metal tape or rigid ruler will bend away from the body and make circumference measurements difficult to read. Check the zero point before you begin, especially if the tape has a metal tip or worn edge.
Wear light clothing. Underwear or a close-fitting base layer gives the tape access to your actual body landmarks. A hoodie, thick sweater, or loose trousers adds extra space around every area and can distort the result. If you'll wear a particular bra or base layer under the garment, note that separately rather than measuring over bulky fabric.
Stand in front of a full-length mirror. You need to see whether the tape is horizontal at the front, side, and back. The mirror also helps you notice twisting, slouching, or an uneven stance that you may not feel.
Mark your natural waist. Tie a thin piece of elastic, ribbon, or string around your middle and let it settle where your torso naturally creases. This gives you a visible reference while measuring the waist and helps you keep related measurements consistent. A flexible tape and a clear landmark are more useful than trying to remember where the waist “seemed” to be.
Prepare a record and the chart. Keep paper and a pen nearby, or open a notes app. Write each measurement immediately, in centimetres or inches, and keep the retailer's size chart visible. A second person can spot-check your shoulders, back, and inseam, but you can still complete the main routine alone.
Stand barefoot on a firm, level floor with your feet comfortably placed and your posture neutral. Don't pose, stretch tall, suck in your stomach, or push your chest forward. The useful reading is the body you'll bring to the garment.
Measuring Bust Waist Hips and Inseam Step by Step
Start with the tape flat against your body, not folded or twisted. For every circumference, check the mirror, keep the tape parallel to the floor, and hold it snugly without pressing into your skin. Take each reading twice and record it straight away. Practical self-measurement guidance recommends a flexible, non-stretch tape, light clothing, a neutral posture, and immediate recording.
Bust or chest
Let your arms hang naturally at your sides. Breathe normally, then take the reading after a regular exhale, without forcing your breath out. Bring the tape around the fullest part of your chest or bust, making sure it passes across the same level at the front and back.
Use the mirror to check the rear section. Solo measurers often let the tape climb between the shoulder blades, which makes the front reading look correct while the total circumference becomes inconsistent. Keep the tape snug, but don't compress the chest. If your hands keep lifting the tape, ask someone to hold the ends while you check the level.
For a fitted top, this measurement is usually more informative than a general clothing size. For a relaxed shirt, a small difference may have less practical effect because the cut provides more ease.
Natural waist
Find the waist by bending gently to one side. The crease that forms is a more reliable landmark than the place where you prefer your waistband to sit. Return to a neutral stance, leave the elastic or string in place, and position the tape over that natural waistline.
Breathe out normally before reading. Don't pull your stomach inward and don't tighten the tape until it leaves an indentation. A useful check is to slide one finger beneath the tape. The tape should touch your body without restricting a normal breath.
Independent measurement guidance emphasizes measuring around the natural waist, keeping the tape level, and avoiding tight tension (accurate body measurement instructions). If your two readings differ noticeably, pause and reset the tape rather than averaging numbers produced by different positions.
Hips
Stand with your feet together and place the tape around the fullest part of your hips and buttocks. The widest point may sit lower than you expect, so move the tape slowly while checking the mirror from the side.
Keep the tape parallel to the floor and don't tilt it upward at the back. The tape should follow the body without digging in. If you struggle to see the rear position, use a second person for this measurement or take a side-view photograph for a private reference.
The hip measurement is especially important for trousers, skirts, and fitted dresses. A waist reading alone can't describe how a garment will pass over the widest part of the lower body.
Inseam
For the most direct body estimate, stand straight and measure from the crotch point down the inside of the leg to the ankle bone. This is awkward to do alone, so a snug-fitting pair of trousers can provide a practical substitute. Lay the garment flat, identify the crotch seam, and measure along the inner leg to the hem.
Record whether the result came from your body or a garment. A trouser chart may also list the rise, thigh, or finished garment length, and those measurements answer different fit questions from the inseam.
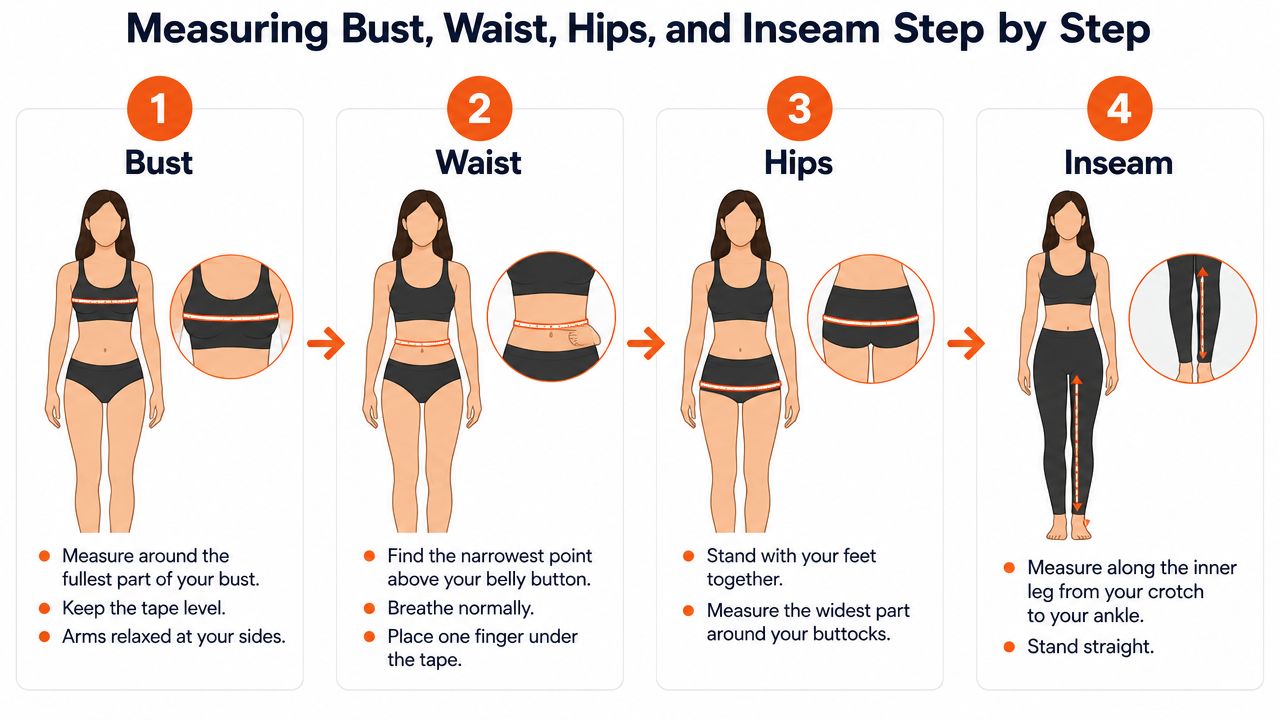
Use the following visual guide as a reminder while you practice the sequence.
Which Measurements Matter for Tops Bottoms and Dresses
You don't need to collect every possible measurement before every purchase. Prioritize the landmarks that control the garment's tightest or most structured areas, then add secondary measurements when the design makes them relevant.
| Garment | Primary Measurements | Secondary Measurements |
|---|---|---|
| Tops | Bust or chest, waist, shoulder width | Sleeve length, arm circumference, torso length |
| Bottoms | Waist, hip, inseam | Rise, thigh circumference, finished length |
| Dresses | Bust, waist, hip, torso length | Shoulder width, sleeve length, dress length |
A top with a loose silhouette may forgive a small shoulder difference, while a fitted blazer cannot. A fitted knit top usually needs a dependable bust measurement, especially if the fabric has limited stretch. Shoulder width and sleeve length become more important when the garment has set-in sleeves or firm fabric.
Bottoms create a different priority. A pair of jeans must pass over the hips and sit securely at the waist, so those two circumferences usually deserve your closest attention. Inseam controls where the hem lands, while rise determines how the garment travels between the waist and crotch. A relaxed pair of elastic-waist trousers may need less precision than structured denim.
Dresses combine the upper and lower body. For a fitted dress, compare bust, waist, and hip values separately instead of choosing one size from a general label. Torso length helps explain why a dress can fit around the body but still pull upward or settle too low at the waist.
A measurement becomes valuable when it answers a specific garment question. Don't collect numbers without knowing what they control.
For examples of how an apparel storefront can present product information and fit-related shopping context, you can review the Shopify storefront work for Negative Underwear. If you're considering a dress and only have limited information, the dress size guide based on height and weight can provide additional context, but it shouldn't replace the garment's own chart when one is available.
Common Measurement Mistakes and How to Fix Them
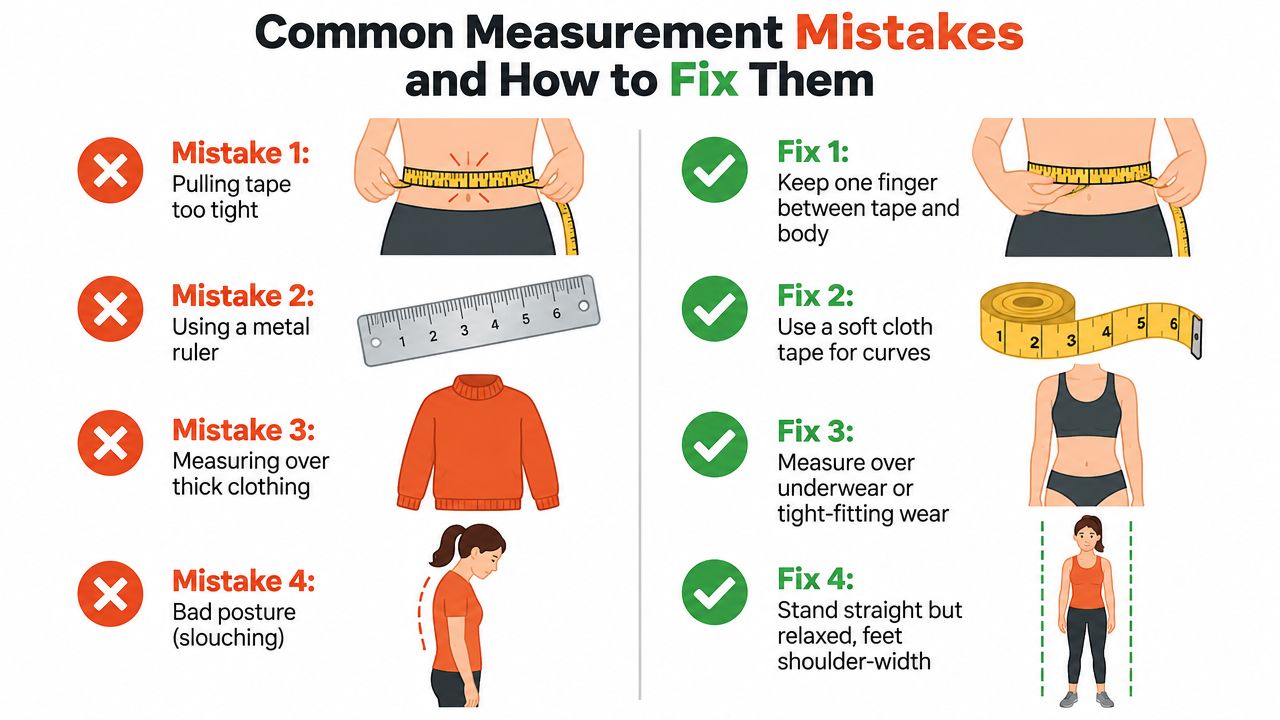
Most measuring errors don't come from forgetting an obscure body part. They come from four simple problems: tension, sagging, clothing, and posture. Fix those first and your chart match becomes much more useful.
Tight tape
Pulling the tape hard can understate a circumference and lead you toward a garment that feels restrictive or won't close comfortably. Hold the tape against the body with light contact, then slide one finger beneath it as a tension check.
Take the reading after a normal exhale. If the tape leaves a visible groove, loosen it and repeat. The point is to capture your relaxed body, not the smallest number you can force.
Sagging tape
A tape that dips at the back adds length to the circumference and can push you toward a larger size. Look at the mirror from the front and side, then reset the tape until it runs horizontally around the body.
This is one reason a second person helps. They can keep the rear section level while you remain relaxed. If you're alone, take a photograph from the side or use the mirror to inspect the tape before reading the number.
Thick clothing
Measuring over a sweater or loose trousers adds fabric volume. That extra bulk can affect every circumference, not just the area where the clothing is thickest.
Wear underwear or fitted clothing instead. If you plan to wear a particular foundation layer under a close-fitting garment, record that choice in your notes rather than changing your body measurement.
Poor posture
Slouching can shorten torso-related measurements and shift the waist landmark. Standing rigidly can create a different distortion, especially if you push your shoulders back or hold your breath.
Stand upright but relaxed, with your weight even on both feet. A wall can help you find a neutral starting position, but don't flatten your body against it or hold yourself unnaturally while taking the reading.
A half-centimetre to one-centimetre difference can happen because of tape placement, breathing, or posture. That's acceptable for a starting record. Repeat the measurement when the difference changes which side of a retailer's size range you fall into, or when the garment is highly fitted. For broader guidance on connecting measurement, body shape, and clothing fit, see fit guidance from Robosize.
Recording and Using Your Numbers at Checkout
A measurement you can't find later is no more useful than one you never took. Create a simple record in a notebook or notes app:
- Garment type: Tops, trousers, jeans, dress, blazer, or another category.
- Measurements: Bust or chest, waist, hip, inseam, and any category-specific values, all in one unit.
- Date taken: Add the day so you know how current the figures are.
- Conditions: Note a sports bra, compression layer, or other clothing that could affect how a fitted garment feels.
- Confidence: Mark a value as “repeat” if the tape was difficult to position or the readings didn't agree.
At checkout, identify the retailer's measurement unit first. To convert centimetres to inches, divide the centimetre value by 2.54. To convert inches to centimetres, multiply by 2.54. Keep the unconverted number in your record so you don't accumulate rounding errors across future purchases.
Read the chart by garment, not by brand reputation. Compare your bust with the top's bust range, your waist and hip with the trouser chart, and all three major circumferences with a fitted dress. If you fall between sizes, don't automatically choose the smaller or larger label. Check the garment's fabric, ease, closure, and the measurement that controls its tightest point.
A medium at one retailer may not match a medium at another. Treat the printed label as a name, not a measurement. Product-specific charts are more useful than trying to build a universal conversion rule.
Retailers are also developing shopping flows that combine size charts with guided recommendations and visual previews. For background on how merchants use AI to create a more personalized shopping experience, see Carti's guide to boosting Shopify conversions with AI.
Refresh your record every few months and after a notable body change. You don't need to measure compulsively. Update it when an old number no longer reflects how your clothes fit.
When Selfies and Virtual Try-On Make More Sense
You have checked the tape twice, but your shoulder or back remains hard to reach, your posture is uneven, or the readings still differ by more than 1.5 centimetres. A third pass may add less value than guided technology, especially when the brand provides no usable size chart.
A selfie workflow suits situations where access or consistency is the problem. Wear fitted clothing, stand against a neutral background, and take front and side images with the phone placed consistently. AI body-measurement systems can estimate circumferences from two photos, but the output remains an estimate, not a clinical or tailor-made measurement. Lighting, camera angle, clothing, and posture can all change the result.
A practical 2025 apparel-sizing study found that a model using a small group of measurements, including bust, waist, and hip, predicted body size with 89.66% accuracy using an SVM model (the study in PMC). The useful lesson is simple: a few consistent measurements can provide substantial sizing information, while inconsistent inputs weaken the recommendation. Solo measuring does introduce error, so use a selfie tool when a third tape pass would repeat the same uncertainty.
Virtual try-on addresses appearance rather than measurement. It helps you assess drape, silhouette, proportion, and visual balance on a body model. A size recommender instead compares your measurements with a particular product. Use both alongside the chart, fabric details, and exchange policy.
Use this order:
- Tape first: Measure bust or chest, waist, hip, and inseam consistently.
- Selfie second: Choose guided photo measurement when manual checks remain inconsistent or difficult points cannot be reached reliably.
- Virtual try-on third: Review the garment's shape and drape on a body model.
- Policy as a safety net: Check exchanges and returns before ordering.
This routine keeps a small measuring error from becoming a rushed purchase: prepare, measure, record, compare, then confirm the details.
Robosize offers an AI virtual fitting room that uses a short questionnaire and optional selfie to create a shopper-specific body model, preview a product, and recommend a garment size. Visit Robosize to compare guided sizing and virtual try-on with your own at-home routine.